NOT FOR PRODUCTION
This is a development image that is useful for getting started quickly in a development environment. It is not suitable for production use and should be used only for development and testing purposes.
Backstage Development Image
Overview
This guide walks you through deploying a development Backstage instance with Syntasso Kratix Enterprise (SKE) plugins pre-installed.
It is:
- ✅ Ideal for local testing and development
- 🚫 Not suitable for production environments or long term use
- ⚠️ Pre-packaged with fixed assumptions around Kubernetes and S3-compatible storage (not flexible or configurable)
For more advanced or production-ready customization, see the Configuring Backstage documentation.
Prerequisites
Before you begin, ensure you have:
- A running Kubernetes cluster
- Access to an S3-compatible bucket (e.g., SeaweedFS, GCS, or S3)
Configuration
What You Need to Configure
Below is an example ConfigMap for Backstage that includes the necessary
configurations to run with Syntasso Kratix Enterprise. This needs to be modified to suit
your environment:
-
To modify to use your own Bucket update the
endpointandbucketNameinintegrations.awsS3andcatalog.providers.awsS3 -
By default Backstage is setup to be accessible via
kubectl port-forward. If you plan to expose Backstage by ingress or NodePort, make surebaseUrlandcors.originmatch your setup.
apiVersion: v1
kind: ConfigMap
metadata:
  name: backstage
  namespace: kratix-platform-system
data:
  config: |
    auth:
      environment: development
      providers:
        guest: {}
    app:
      title: Backstage Dev Build By Syntasso
      # OPTIONAL: If your using a different nodeport, modify the baseUrl to match the nodeport
      baseUrl: http://localhost:31340
    organization:
      name: app-config
    backend:
      baseUrl: http://localhost:31340
      listen:
        port: 7007
        host: 0.0.0.0
      csp:
        upgrade-insecure-requests: false
        connect-src: ["'self'", "http:", "https:"]
      cors:
        origin: http://localhost:31340
        methods: [GET, HEAD, PATCH, POST, PUT, DELETE]
        credentials: true
      database:
        client: better-sqlite3
        connection: ":memory:"
      cache:
        store: memory
      auth:
        dangerouslyDisableDefaultAuthPolicy: true
    integrations:
      awsS3:
          # We will show how to configure the source of these environment variables later
        - accessKeyId: ${AWS_ACCESS_KEY_ID}
          secretAccessKey: ${AWS_SECRET_ACCESS_KEY}
          # OPTIONAL: Modify to match the endpoint for your S3 compatible bucket.
          endpoint: 'http://bucket.seaweedfs.svc.cluster.local'
          s3ForcePathStyle: true
    techdocs:
      builder: "local"
      generator:
        runIn: "docker"
      publisher:
        type: "local"
    catalog:
      import:
        entityFilename: catalog-info.yaml
        pullRequestBranchName: backstage-integration
      rules:
        - allow:
            [Domain, Component, System, API, Resource, Location, Group, Template]
      locations:
        - type: file
          target: ../../examples/template/template-ske.yaml
          rules:
            - allow: [Template]
        - type: file
          target: ../../examples/entities.yaml
          rules:
            - allow:
                [
                  Domain,
                  Component,
                  System,
                  API,
                  Resource,
                  Location,
                  Group,
                  Template,
                ]
        - type: file
          target: ../../examples/org.yaml
          rules:
            - allow: [User, Group]
      providers:
        awsS3:
          kratix-bucket:
          # OPTIONAL: Modify to match your bucket name and configuration.
            bucketName: kratix
            prefix: backstage/
            region: us-east-1
            schedule:
              frequency: { seconds: 10 }
              timeout: { seconds: 20 }
    kubernetes:
      serviceLocatorMethod:
        type: multiTenant
      clusterLocatorMethods:
        - type: config
          clusters:
            - url: "https://kubernetes.default.svc.cluster.local"
              name: platform
              authProvider: serviceAccount
              serviceAccountToken: ${SA_TOKEN}
              skipTLSVerify: true
    ske:
      kubernetes:
        platformName: platform
Once you have modified the configuration, store it in a local file and create the ConfigMap in your Kubernetes cluster:
kubectl apply -f configmap.yaml
Installation
Once your ConfigMap is ready, all thats left is to deploy Backstage with the
provided manifest below. The manifest can be updated to:
-
Reference the Bucket secret
-
Any ingress modifications you may want to make, such as using as NodePort.
-
ClusterRole modifications if you want to limit what Backstage can access. It needs access to all Promises and all Promise APIs. By default it has cluster-wide access to all resources.
---
apiVersion: apps/v1
kind: Deployment
metadata:
  labels:
    app: backstage
  name: backstage
  namespace: kratix-platform-system
spec:
  replicas: 1
  selector:
    matchLabels:
      app: backstage
  template:
    metadata:
      labels:
        app: backstage
    spec:
      serviceAccountName: backstage
      imagePullSecrets:
      - name: syntasso-registry
      containers:
      - env:
        - name: AWS_ACCESS_KEY_ID
          valueFrom:
            secretKeyRef:
              # OPTIONAL: Modify to match the secret for access to your bucket.
              name: bucket-credentials
              key: accessKeyID
        - name: AWS_SECRET_ACCESS_KEY
          valueFrom:
            secretKeyRef:
              # OPTIONAL: Modify to match the secret for access to your bucket.
              name: bucket-credentials
              key: secretAccessKey
        - name: SA_TOKEN
          valueFrom:
            secretKeyRef:
              # Do not edit, this secret gets created within this manifest
              name: backstage-token
              key: token
        image: ghcr.io/syntasso/backstage-dev-build:latest
        imagePullPolicy: IfNotPresent
        name: backstage
        ports:
        - containerPort: 7007
          protocol: TCP
        resources: {}
        terminationMessagePath: /dev/termination-log
        terminationMessagePolicy: File
        volumeMounts:
        - mountPath: /config
          name: config
      dnsPolicy: ClusterFirst
      restartPolicy: Always
      schedulerName: default-scheduler
      securityContext: {}
      terminationGracePeriodSeconds: 30
      volumes:
      - configMap:
          defaultMode: 420
          items:
          - key: config
            path: app-config.yaml
          name: backstage
        name: config
---
apiVersion: v1
kind: Service
metadata:
  name: backstage
  namespace: kratix-platform-system
spec:
  ports:
    - port: 7007
      protocol: TCP
  selector:
    app: backstage
---
apiVersion: rbac.authorization.k8s.io/v1
kind: ClusterRole
metadata:
  name: backstage
rules:
  # OPTIONAL: These are broad security settings, you can limit backstage permissions here.
- apiGroups: ["*"]
  resources: ["*"]
  verbs: ["*"]
---
apiVersion: rbac.authorization.k8s.io/v1
kind: ClusterRoleBinding
metadata:
  name: backstage
roleRef:
  apiGroup: rbac.authorization.k8s.io
  kind: ClusterRole
  name: backstage
subjects:
- kind: ServiceAccount
  name: backstage
  namespace: kratix-platform-system
---
apiVersion: v1
kind: ServiceAccount
metadata:
  name: backstage
  namespace: kratix-platform-system
---
apiVersion: v1
kind: Secret
metadata:
  name: backstage-token
  namespace: kratix-platform-system
  annotations:
    kubernetes.io/service-account.name: backstage
type: kubernetes.io/service-account-token
Once modified and saved, apply the manifest to your cluster:
kubectl apply -f backstage.yaml
Accessing Backstage
-
If using NodePort or Ingress, visit your corresponding address, e.g:
http://localhost:31340 -
If using port-forwarding, run the following command in your terminal:
kubectl port-forward service/backstage -n kratix-platform-system 7007:7007
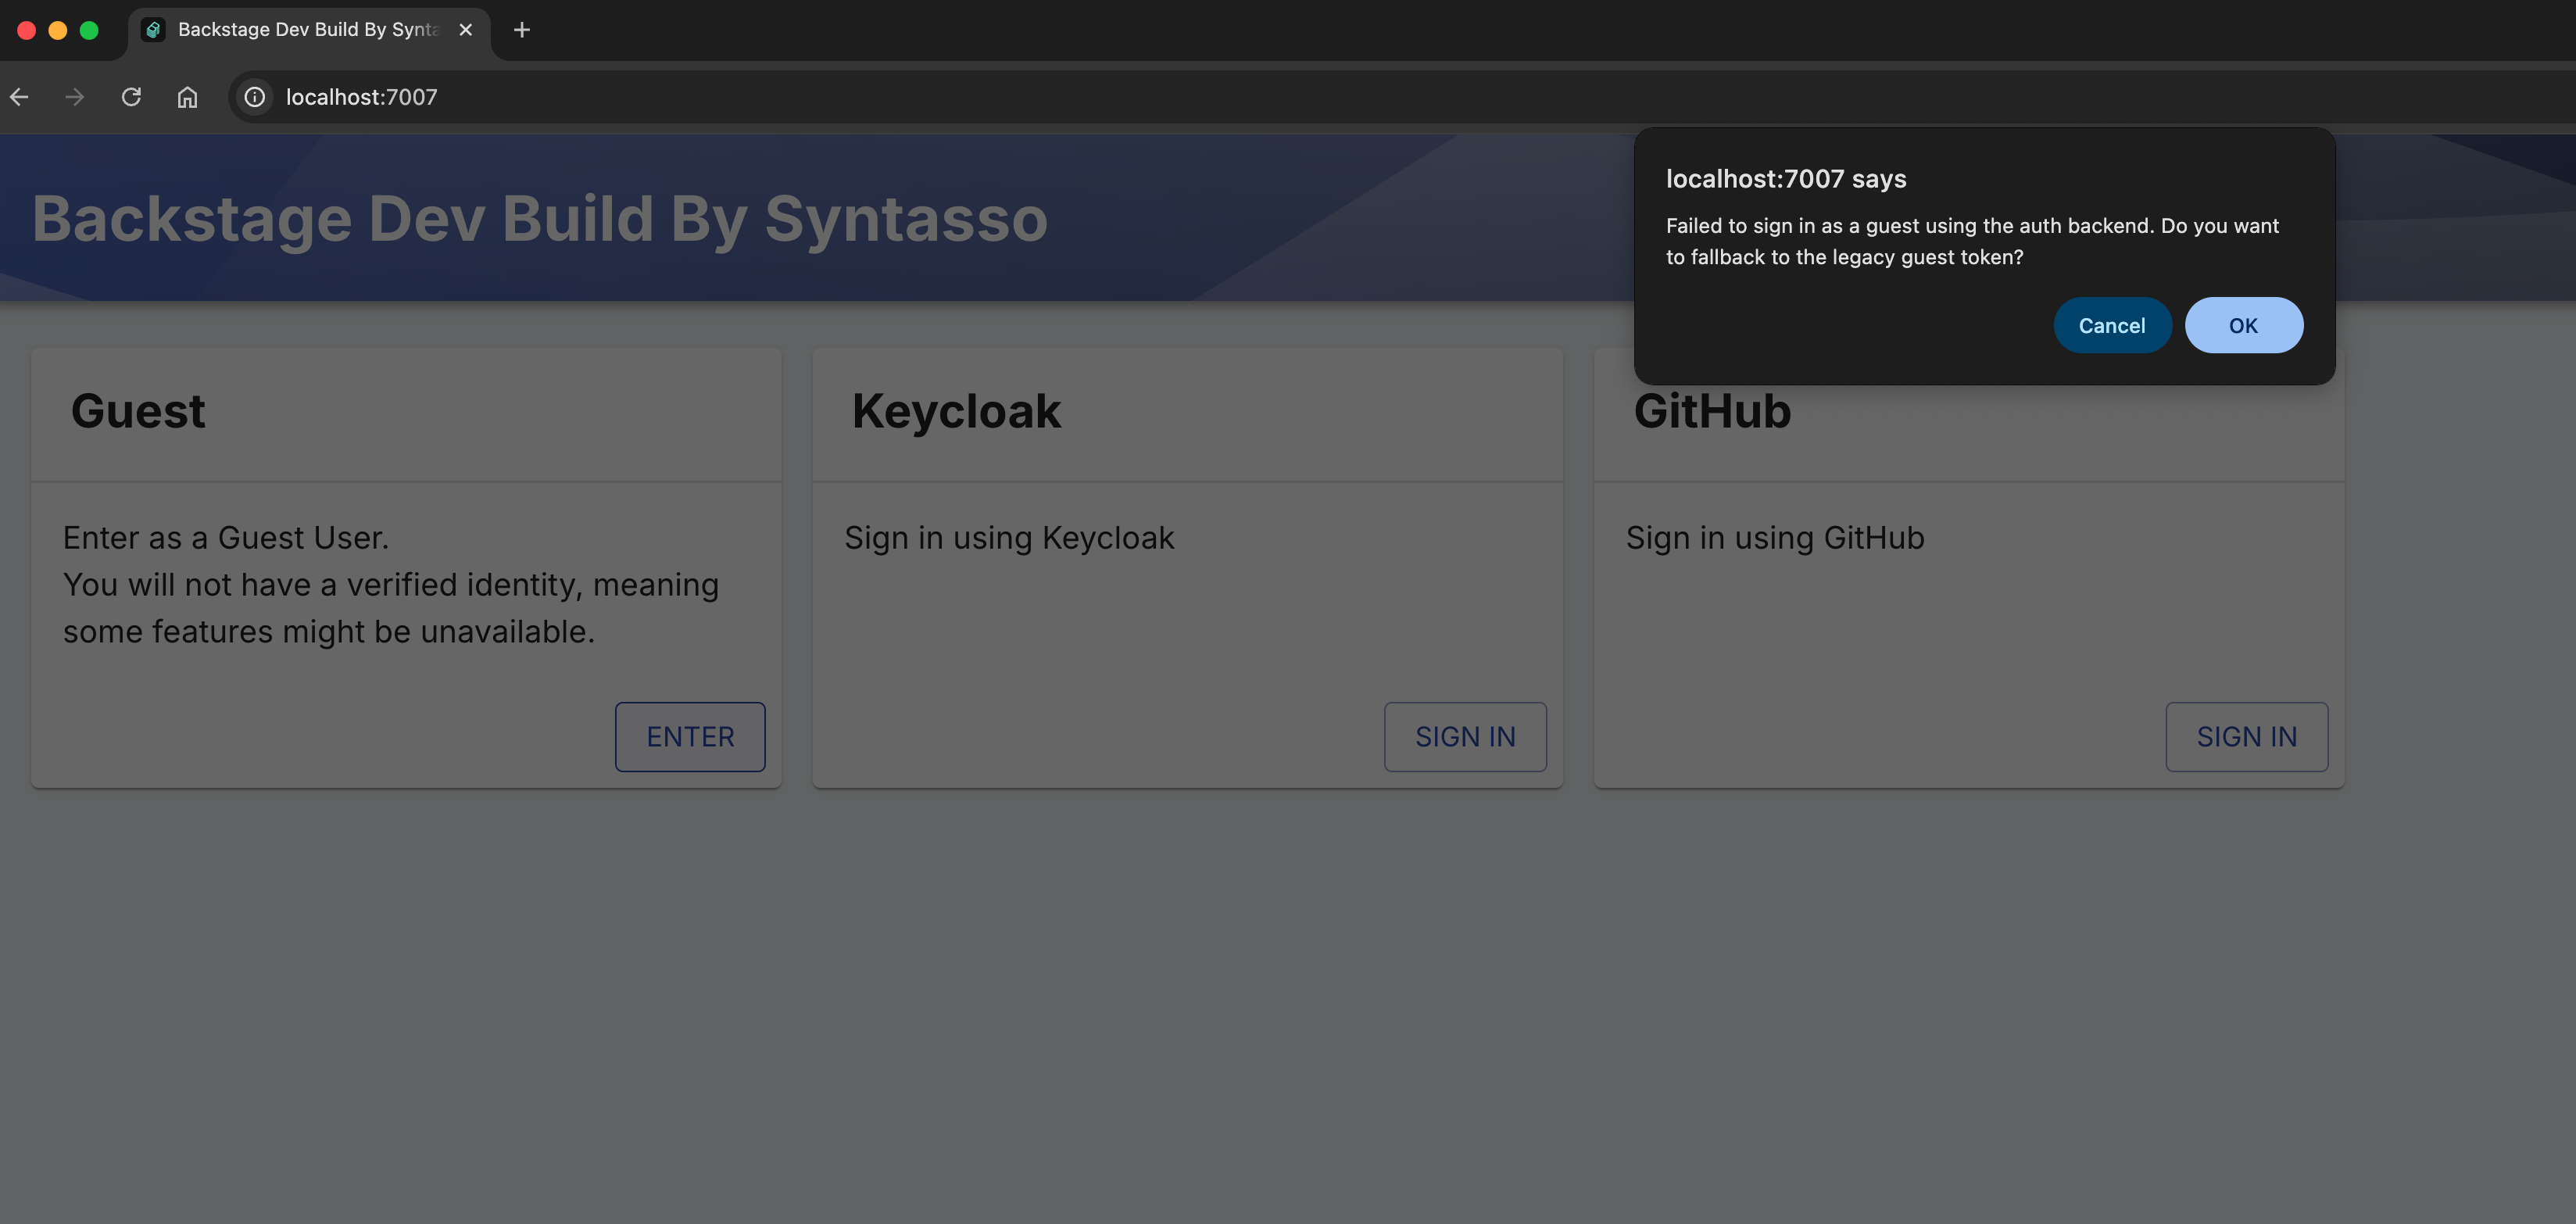
Then navigate to: http://localhost:7007. You can login using the legacy guest token method by click ok on the pop up when selecting the Guest login method.
Next Steps
Now that Backstage is running:
- Follow the Backstage Destination documentation to configure Kratix to manage the component and template configuration.
- Use and configure automatic access to your Promises in Backstage.
