Kratix, Backstage, and OIDC

The newly released version of the SKE Backstage plugins will no longer rely on a Git repository to perform CRUD operations on the Kubernetes Cluster. Instead, they will now use the Kubernetes API to manage the resources directly. This enables users to get the most up-to-date information on their resources, as well as manage resources created via other means, like via kubectl.
One important aspect is that you can now use the plugins with OIDC providers, allowing you to have finer control over the authentication and authorisation process.
In this blog, we'll go through the process of setting up your Kubernetes Cluster with Keycloak, and configuring Backstage to use it for authentication. We will then configure the SKE Backstage plugins to use the OIDC token provided by Keycloak.
Deploying Keycloak
The first thing you will need is a Keycloak instance. Setting one up can be quite a complicated process, and a bit out of scope for this blog.
For simplicity, we will be using a hosted Keycloak instance from cloud-iam.com. You can sign up for a free account and get a Keycloak instance up and running in minutes. Once deployed, take note of the realm. You will need it on the next steps.
If you deploy your Keycloak instance with cloud-iam.com, you should receive the admin password in the email sent to you once your Deployment is ready.
Creating the resources
Now that you have your Keycloak instance up and running, you will need to set up the clients for Backstage and Kubernetes. You can go through the UI and manually create them, or you can use the Keycloak Terraform Provider. You will need:
- A Client for Backstage and a Client for Kubernetes
- Users that can login to both Backstage and Kubernetes
- The Groups that will be used to control access to the Kubernetes Cluster
The following Terraform configuration sets up the Keycloak clients, user accounts, and group-based access control. Save it to a file called keycloak.tf and run terraform init && terraform apply --auto-aprove.
Keycloak Terraform Configuration
Make sure to update the highlighted values accordingly.
terraform {
  required_providers {
    keycloak = {
      source  = "keycloak/keycloak"
      version = ">= 5.0.0"
    }
  }
}

provider "keycloak" {
  client_id = "admin-cli"
  username  = "admin"
  password  = "<YOUR ADMIN PASSWORD>"
  url       = "https://lemur-10.cloud-iam.com/auth" # double check the URL!
  realm     = "myrealm"
}

locals {
  realm_id = "myrealm"
  groups   = ["kube-dev", "kube-admin"]
  user_groups = {
    user-dev   = ["kube-dev"]
    backstage  = ["kube-dev"]
    user-admin = ["kube-admin"]
  }
}

resource "keycloak_group" "groups" {
  for_each = toset(local.groups)
  realm_id = local.realm_id
  name     = each.key
}

resource "keycloak_user" "users" {
  for_each       = local.user_groups
  realm_id       = local.realm_id
  username       = each.key
  enabled        = true
  email          = "${each.key}@kratix.io"
  email_verified = true
  first_name     = each.key
  last_name      = each.key
  initial_password {
    value = each.key
  }
}

resource "keycloak_user_groups" "user_groups" {
  for_each  = local.user_groups
  realm_id  = local.realm_id
  user_id   = keycloak_user.users[each.key].id
  group_ids = [for g in each.value : keycloak_group.groups[g].id]
}

resource "keycloak_openid_client_scope" "groups" {
  realm_id               = local.realm_id
  name                   = "groups"
  include_in_token_scope = true
  gui_order              = 1
}

resource "keycloak_openid_group_membership_protocol_mapper" "groups" {
  realm_id        = local.realm_id
  client_scope_id = keycloak_openid_client_scope.groups.id
  name            = "groups"
  claim_name      = "groups"
  full_path       = false
}

resource "keycloak_openid_client" "kube" {
  realm_id                     = local.realm_id
  client_id                    = "kube"
  name                         = "kube"
  enabled                      = true
  access_type                  = "CONFIDENTIAL"
  client_secret                = "kube-client-secret"
  standard_flow_enabled        = false
  implicit_flow_enabled        = false
  direct_access_grants_enabled = true
}

resource "keycloak_openid_client" "backstage-client" {
  realm_id                     = local.realm_id
  client_id                    = "backstage-client"
  name                         = "backstage-client"
  enabled                      = true
  access_type                  = "CONFIDENTIAL"
  client_secret                = "backstage-client-secret"
  standard_flow_enabled        = true
  implicit_flow_enabled        = false
  direct_access_grants_enabled = true
  valid_redirect_uris = [
    "http://localhost:7007/api/auth/keycloak/handler/frame",
    "http://localhost:3003/api/auth/keycloak/handler/frame",
    "http://localhost:3000/api/auth/keycloak/handler/frame",
  ]
}

resource "keycloak_openid_audience_protocol_mapper" "backstage_client_audience" {
  realm_id                 = local.realm_id
  client_id                = keycloak_openid_client.backstage-client.id
  name                     = "kube-audience"
  included_custom_audience = "kube"
}

resource "keycloak_openid_client_default_scopes" "backstage-client" {
  realm_id  = local.realm_id
  client_id = keycloak_openid_client.backstage-client.id
  default_scopes = [
    "email", "basic", "profile", "groups"
  ]
}

resource "keycloak_openid_client_default_scopes" "kube" {
  realm_id  = local.realm_id
  client_id = keycloak_openid_client.kube.id
  default_scopes = [
    "email",
    keycloak_openid_client_scope.groups.name,
  ]
}
Deploying the Cluster
Now that your Keycloak instance is up and running, and the resources are created, you can connect your Kubernetes cluster to it. In this blog post, we will deploy a KinD cluster. For clusters deployed by other means, please check the appropriate documentation.
Cluster configuration
To deploy a KinD cluster with OIDC, save the following configuration to a file called config.yaml:
kind: Cluster
apiVersion: kind.x-k8s.io/v1alpha4
kubeadmConfigPatches:
  - |
    kind: ClusterConfiguration
    apiServer:
      extraArgs:
        oidc-client-id: kube
        # Update this!
        oidc-issuer-url:  https://lemur-10.cloud-iam.com/auth/realms/myrealm
        oidc-username-claim: email
        oidc-groups-claim: groups
nodes:
  - role: control-plane
    extraMounts:
    extraPortMappings:
      - containerPort: 31337
        hostPort: 31337
      - containerPort: 31340
        hostPort: 31340
      - containerPort: 31333
        hostPort: 31333
You can now use the Kratix quick-start script to deploy the Cluster with OIDC and install Kratix on it. If you don't have the Kratix repository cloned locally, run:
git clone https://github.com/syntasso/kratix.git
cd kratix
Now, from the Kratix repository, run:
KIND_PLATFORM_CONFIG=/path/to/config.yaml \
  ./scripts/quick-start.sh \
  --git-and-minio \
  --recreate
You can also deploy the cluster directly with KinD:
kind create cluster --config config.yaml --name platform
Creating the RBAC resources
Next, you need to give the groups the necessary permissions to access the cluster. If you check the terraform configuration, you will see that the groups defined in the user_groups variable: kube-dev and kube-admin.
Create the necessary RBAC resources:
kube-adminshould havecluster-adminrolekube-devshould have be able to read every resource, but not create, update or delete
The ClusterRole and ClusterRoleBinding resources can be defined as follows:
kind: ClusterRoleBinding
apiVersion: rbac.authorization.k8s.io/v1
metadata:
  name: kube-admin
subjects:
  - kind: Group
    name: kube-admin
    apiGroup: rbac.authorization.k8s.io
roleRef:
  apiGroup: rbac.authorization.k8s.io
  kind: ClusterRole
  name: cluster-admin
---
apiVersion: rbac.authorization.k8s.io/v1
kind: ClusterRole
metadata:
  name: cr-reader
rules:
  - apiGroups:
      - "*"
    resources:
      - "*"
    verbs:
      - get
      - list
      - watch
---
kind: ClusterRoleBinding
apiVersion: rbac.authorization.k8s.io/v1
metadata:
  name: kube-dev
subjects:
  - kind: Group
    name: kube-dev
    apiGroup: rbac.authorization.k8s.io
roleRef:
  apiGroup: rbac.authorization.k8s.io
  kind: ClusterRole
  name: cr-reader
Save that to a file called rbac.yaml and apply it to your cluster:
kubectl apply -f rbac.yaml --context kind-platform
Validating user access
To validate the user access, you will need to:
- Login with both users.
- Check that the
user-admin(that's part of thekube-admingroup) user can create a resource. - Check that the
user-dev(that's part of thekube-devgroup) user can read but not create resources.
The easiest way to login is to execute the script below. First, export the KEYCLOAK_URL env variable with the Keycloak issuer URL:
export KEYCLOAK_URL="https://lemur-10.cloud-iam.com/auth/realms/myrealm"
Then, run the script below:
kubectl_config(){
  local ENDPOINT=${KEYCLOAK_URL}/protocol/openid-connect/token
  local ID_TOKEN=$(curl --silent -k -X POST $ENDPOINT \
    -d grant_type=password \
    -d client_id=kube \
    -d client_secret=kube-client-secret \
    -d username=$1 \
    -d password=$1 \
    -d scope=openid \
    -d response_type=id_token | jq -r '.id_token')
  local REFRESH_TOKEN=$(curl --silent -k -X POST $ENDPOINT \
    -d grant_type=password \
    -d client_id=kube \
    -d client_secret=kube-client-secret \
    -d username=$1 \
    -d password=$1 \
    -d scope=openid \
    -d response_type=id_token | jq -r '.refresh_token')

  kubectl config set-credentials $1 \
    --auth-provider=oidc \
    --auth-provider-arg=client-id=kube \
    --auth-provider-arg=client-secret=kube-client-secret \
    --auth-provider-arg=idp-issuer-url=$KEYCLOAK_URL \
    --auth-provider-arg=id-token=$ID_TOKEN \
    --auth-provider-arg=refresh-token=$REFRESH_TOKEN

  kubectl config set-context $1 --cluster=kind-platform --user=$1
}

# setup config for our users
kubectl_config user-admin
kubectl_config user-dev
The script above should create two new contexts: user-admin and user-dev. You can easily switch between them by using the --context flag. To test the access the different users have, you can run the following:
kubectl --context user-admin create namespace test-ns
# namespace/test-ns created

kubectl --context user-dev create namespace test-ns-2
# Error from server (Forbidden): namespaces is forbidden: User "user-dev@syntasso.io" cannot create resource "namespaces" in API group "" at the cluster scope

kubectl --context user-dev get namespace test-ns
# NAME      STATUS   AGE
# test-ns   Active   1m

kubectl --context user-dev delete namespace test-ns
# Error from server (Forbidden): namespaces "test-ns" is forbidden: User "user-dev@syntasso.io" cannot delete resource "namespaces" in API group "" in the namespace "test-ns"

kubectl --context user-admin delete namespace test-ns
# namespace "test-ns" deleted
Great! You can now move on configuring Backstage.
Configuring Backstage
Assuming you already have a Backstage instance, you will need to do the following changes to configure it to use Keycloak for authentication:
- Create an API reference to identify the Keycloak provider.
- Create the API factory that will handle the authentication.
- Create the Keycloak Auth provider Resolver.
- Configure the provider to access the Keycloak instance.
- Add Keycloak to the sign in page so users can login with it.
The steps above are explained in details as part of the OIDC provider from scratch guide in the Backstage docs. Below, you will find the code snippets you will need to include in your Backstage instance.
You can skip this entire section by cloning the Backstage app available here. You still need to authenticate with the Syntasso Registry to run yarn install. Check Accessing the Private NPM registry docs for details.
Check the README in the repository for details about how to run the app.
The API reference
Open the packages/app/src/apis.ts file and add the following snippet:
import {
  AnyApiFactory,
  configApiRef,
  createApiFactory,
  OpenIdConnectApi,
  ProfileInfoApi,
  BackstageIdentityApi,
  SessionApi,
  createApiRef,
  ApiRef,
} from "@backstage/core-plugin-api";

export const keycloakOIDCAuthApiRef: ApiRef<
  OpenIdConnectApi & ProfileInfoApi & BackstageIdentityApi & SessionApi
> = createApiRef({
  id: "auth.keycloak",
});
The API factory
Still in the apis.ts file, create a new API factory and add to the apis array:
import { OAuth2 } from "@backstage/core-app-api";
import {
  discoveryApiRef,
  oauthRequestApiRef,
} from "@backstage/core-plugin-api";

export const apis: AnyApiFactory[] = [
  /* this is the new API factory */
  createApiFactory({
    api: keycloakOIDCAuthApiRef,
    deps: {
      discoveryApi: discoveryApiRef,
      oauthRequestApi: oauthRequestApiRef,
      configApi: configApiRef,
    },
    factory: ({ discoveryApi, oauthRequestApi, configApi }) =>
      OAuth2.create({
        configApi,
        discoveryApi,
        oauthRequestApi,
        provider: {
          id: "keycloak",
          title: "Keycloak Provider",
          icon: () => null,
        },
        environment: configApi.getOptionalString("auth.environment"),
        defaultScopes: ["openid", "profile", "email"],
        popupOptions: {
          size: { fullscreen: true },
        },
      }),
  }),

  /* these are the existing API factories */
  createApiFactory({
    api: scmIntegrationsApiRef,
    deps: { configApi: configApiRef },
    factory: ({ configApi }) => ScmIntegrationsApi.fromConfig(configApi),
  }),
  ScmAuth.createDefaultApiFactory(),
];
The Keycloak Auth Resolver
You will need to include a couple of modules to your backend dependencies:
yarn --cwd packages/backend add @backstage/plugin-auth-backend-module-oidc-provider
yarn --cwd packages/backend add @backstage/backend-plugin-api
yarn --cwd packages/backend add @backstage/catalog-model
Next, open the packages/backend/src/index.js and add register the keycloak provider:
Make sure to include the snippet below before the backend.start() call.
import {
  authProvidersExtensionPoint,
  createOAuthProviderFactory,
  OAuthAuthenticator,
} from '@backstage/plugin-auth-node';
import { oidcAuthenticator } from '@backstage/plugin-auth-backend-module-oidc-provider';
import { createBackendModule } from '@backstage/backend-plugin-api';
import {
  stringifyEntityRef,
  DEFAULT_NAMESPACE,
} from '@backstage/catalog-model';

const kcAuthProviderModule = createBackendModule({
  // This ID must be exactly "auth" because that's the plugin it targets
  pluginId: 'auth',
  // This ID must be unique, but can be anything
  moduleId: 'keycloak',
  register(reg) {
    reg.registerInit({
      deps: { providers: authProvidersExtensionPoint },
      async init({ providers }) {
        providers.registerProvider({
          // This ID must match the actual provider config, e.g. addressing
          // auth.providers.azure means that this must be "azure".
          providerId: 'keycloak',
          // Use createProxyAuthProviderFactory instead if it's one of the proxy
          // based providers rather than an OAuth based one
          factory: createOAuthProviderFactory({
            // For more info about authenticators please see https://backstage.io/docs/auth/add-auth-provider/#adding-an-oauth-based-provider
            authenticator: oidcAuthenticator as OAuthAuthenticator<unknown, any>,
            async signInResolver(info, ctx) {
              console.log(info);
              const userRef = stringifyEntityRef({
                kind: 'User',
                name: info?.result.fullProfile.userinfo.name as string,
                namespace: DEFAULT_NAMESPACE,
              });
              return ctx.issueToken({
                claims: {
                  sub: userRef, // The user's own identity
                  ent: [userRef], // A list of identities that the user claims ownership through
                  tok: info?.result.session.accessToken, // this is important!
                },
              });
            },
          }),
        });
      },
    });
  },
});

backend.add(kcAuthProviderModule);
The provider configuration
In your app-config.yaml, add the following configuration, making sure you update the URLs accordingly:
auth:
  environment: development
  session:
    secret: a-session-secret
  providers:
    keycloak:
      development:
        metadataUrl: ${KEYCLOAK_URL}/.well-known/openid-configuration
        clientId: backstage-client
        clientSecret: backstage-client-secret
        prompt: auto
        authorizationUrl: ${KEYCLOAK_URL}/protocol/openid-connect/auth
        tokenUrl: ${KEYCLOAK_URL}/protocol/openid-connect/token
The Sign In page
Finally, add Keycloak to the SignInPage component in the packages/app/src/App.tsx file:
import { keycloakOIDCAuthApiRef } from "./apis";

const app = createApp({
  apis,
  /* ... */
  components: {
    SignInPage: (props) => (
      <SignInPage
        {...props}
        auto
        providers={[
          "guest",
          {
            id: "keycloak",
            title: "Keycloak",
            message: "Sign in using Keycloak",
            apiRef: keycloakOIDCAuthApiRef,
          },
        ]}
      />
    ),
  },
});
Testing it all together
At this stage, you should be able to sign in with Keycloak and access your Backstage instance.
In a terminal, start your Backstage app and open it in your browser.
Depending on your version of Backstage, you may need to run yarn dev or yarn start to start the app.
You should see the Sign In page with Keycloak as an option:
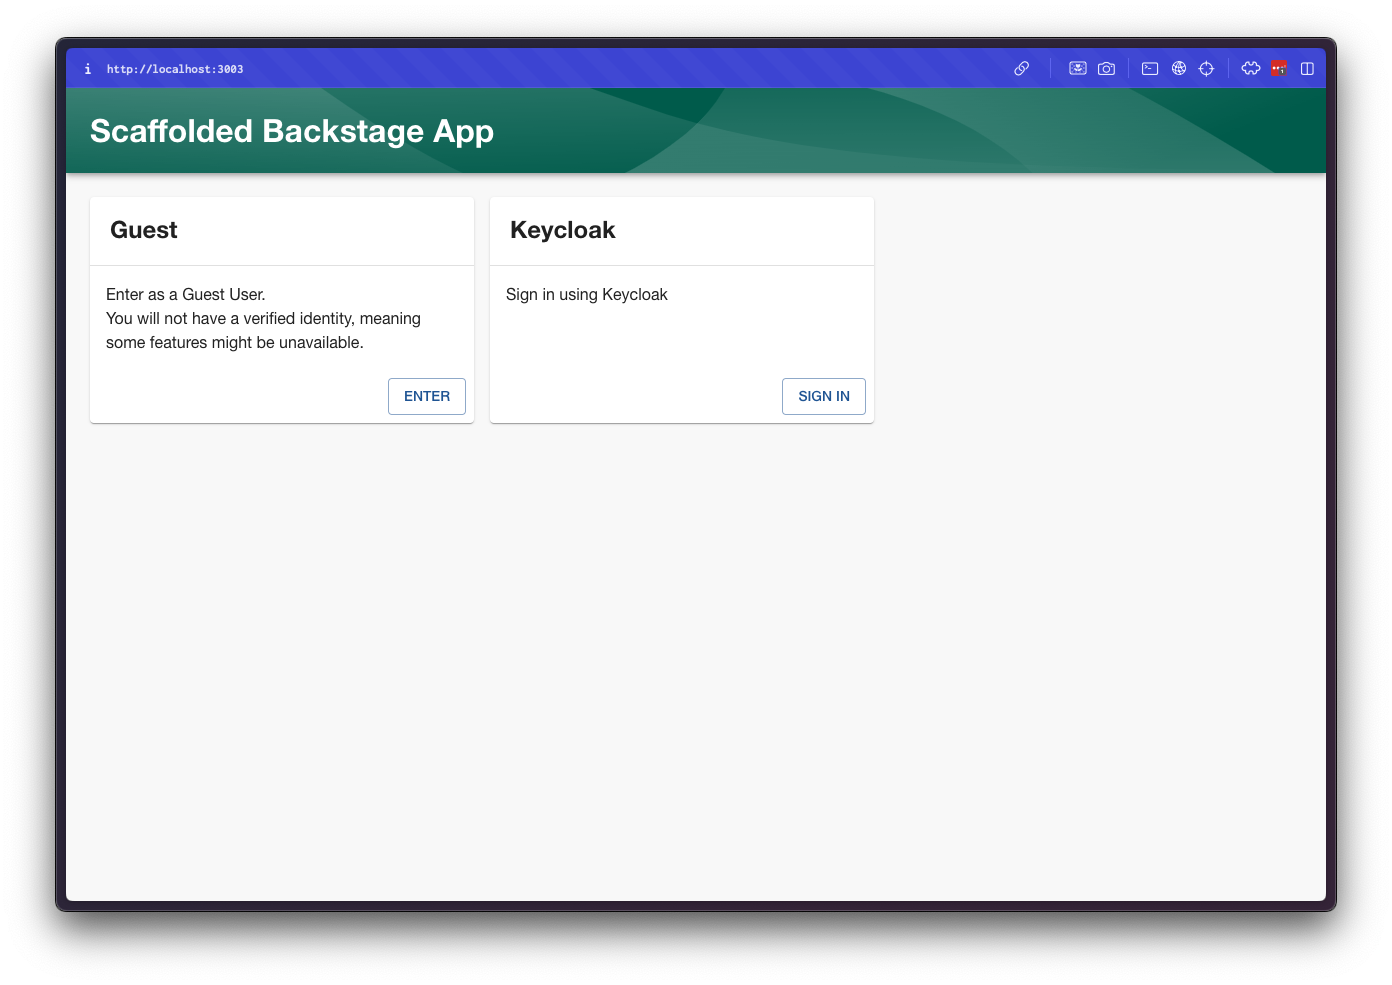
Clicking in the Keycloak option will redirect you to the Keycloak login page:
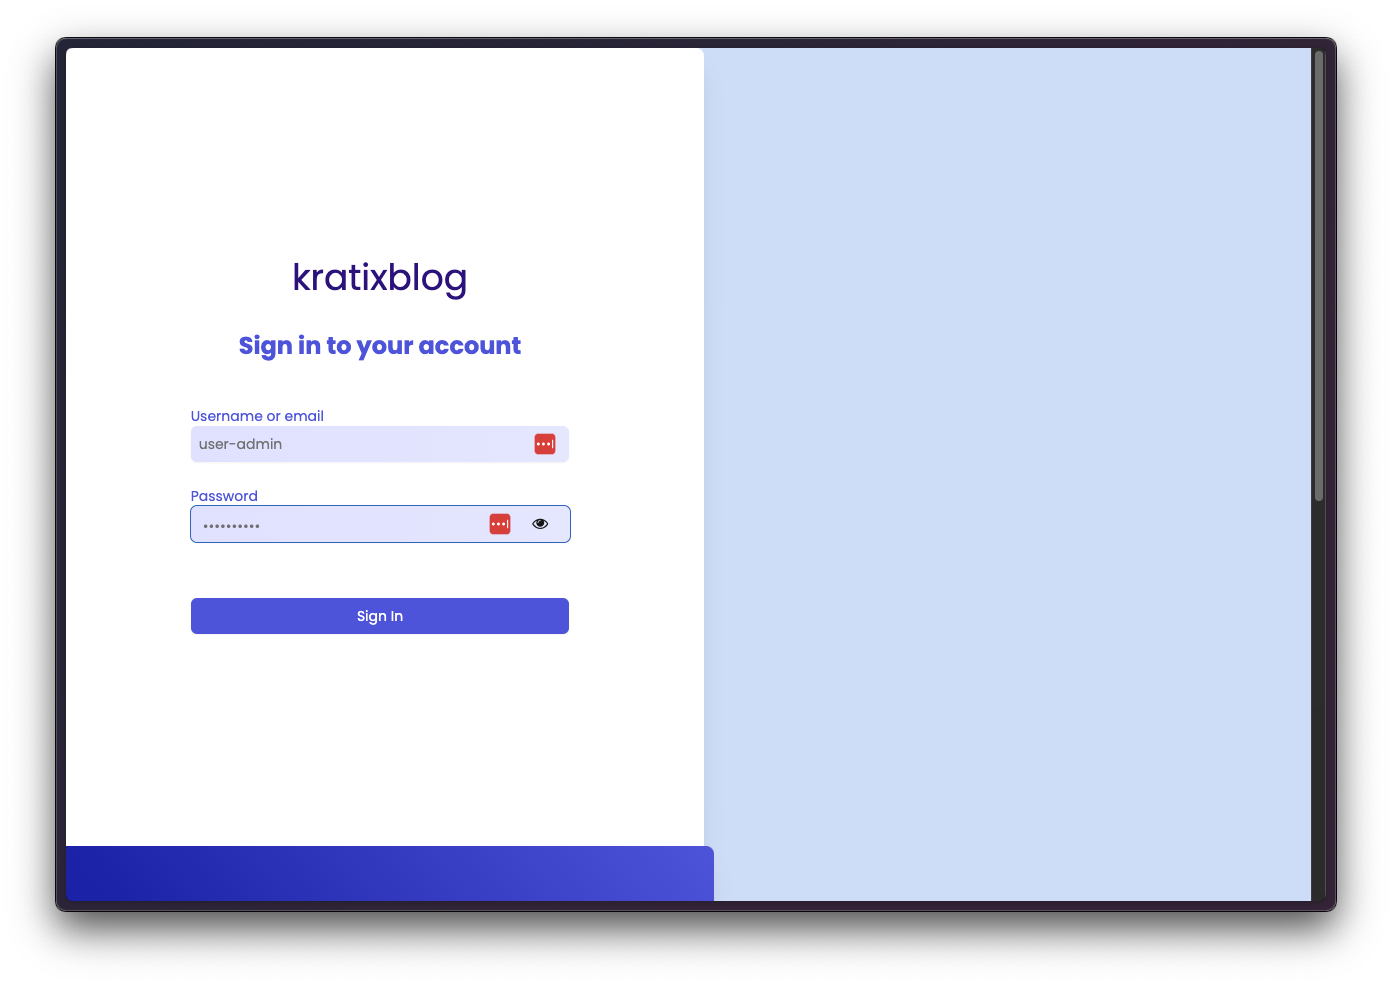
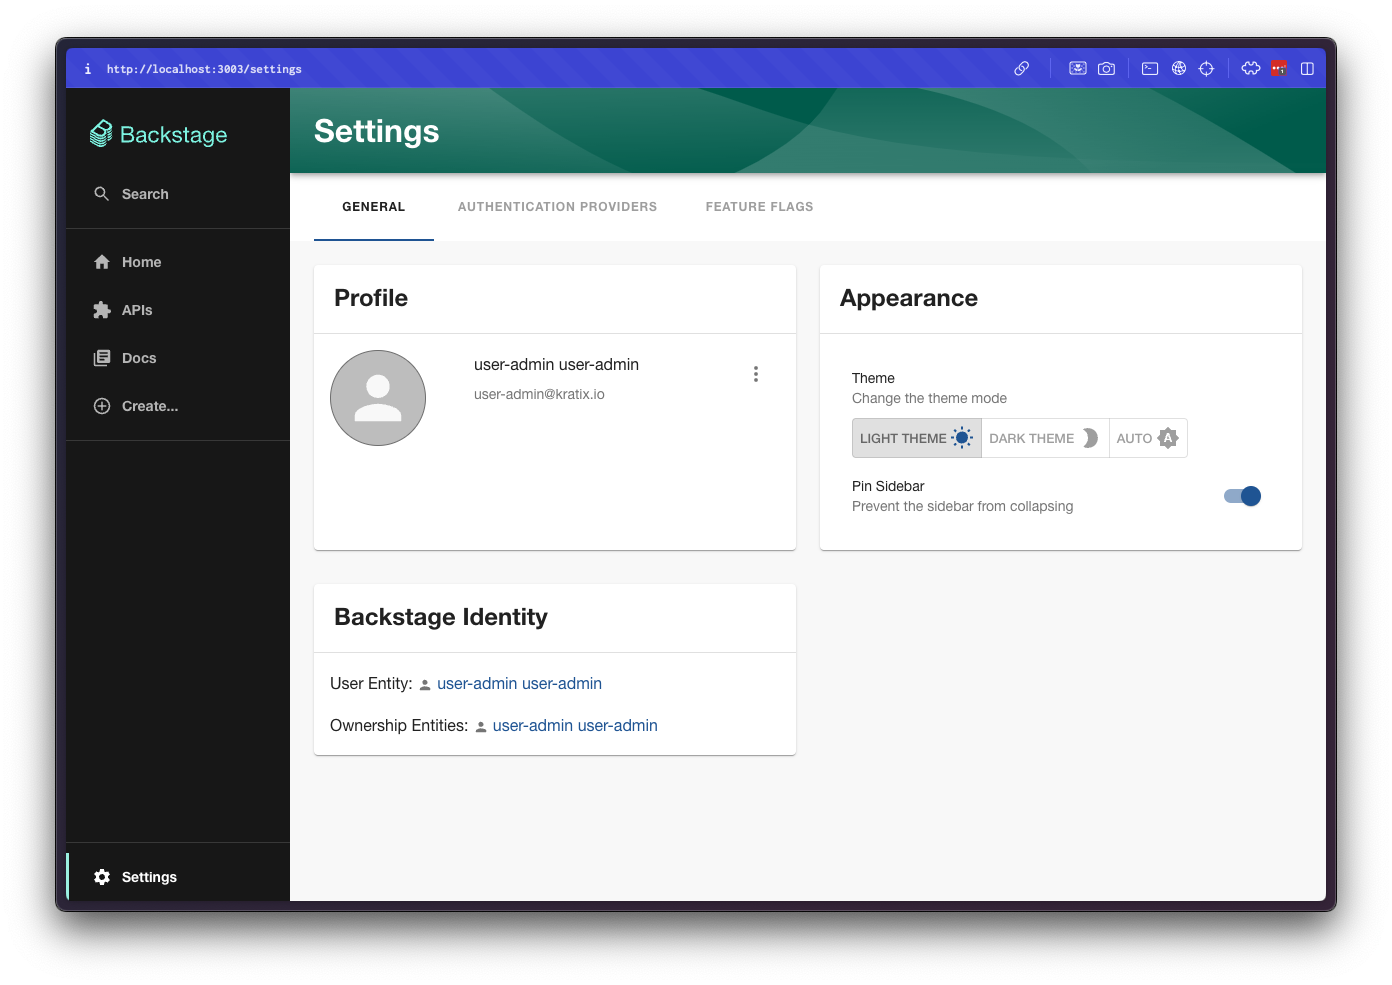
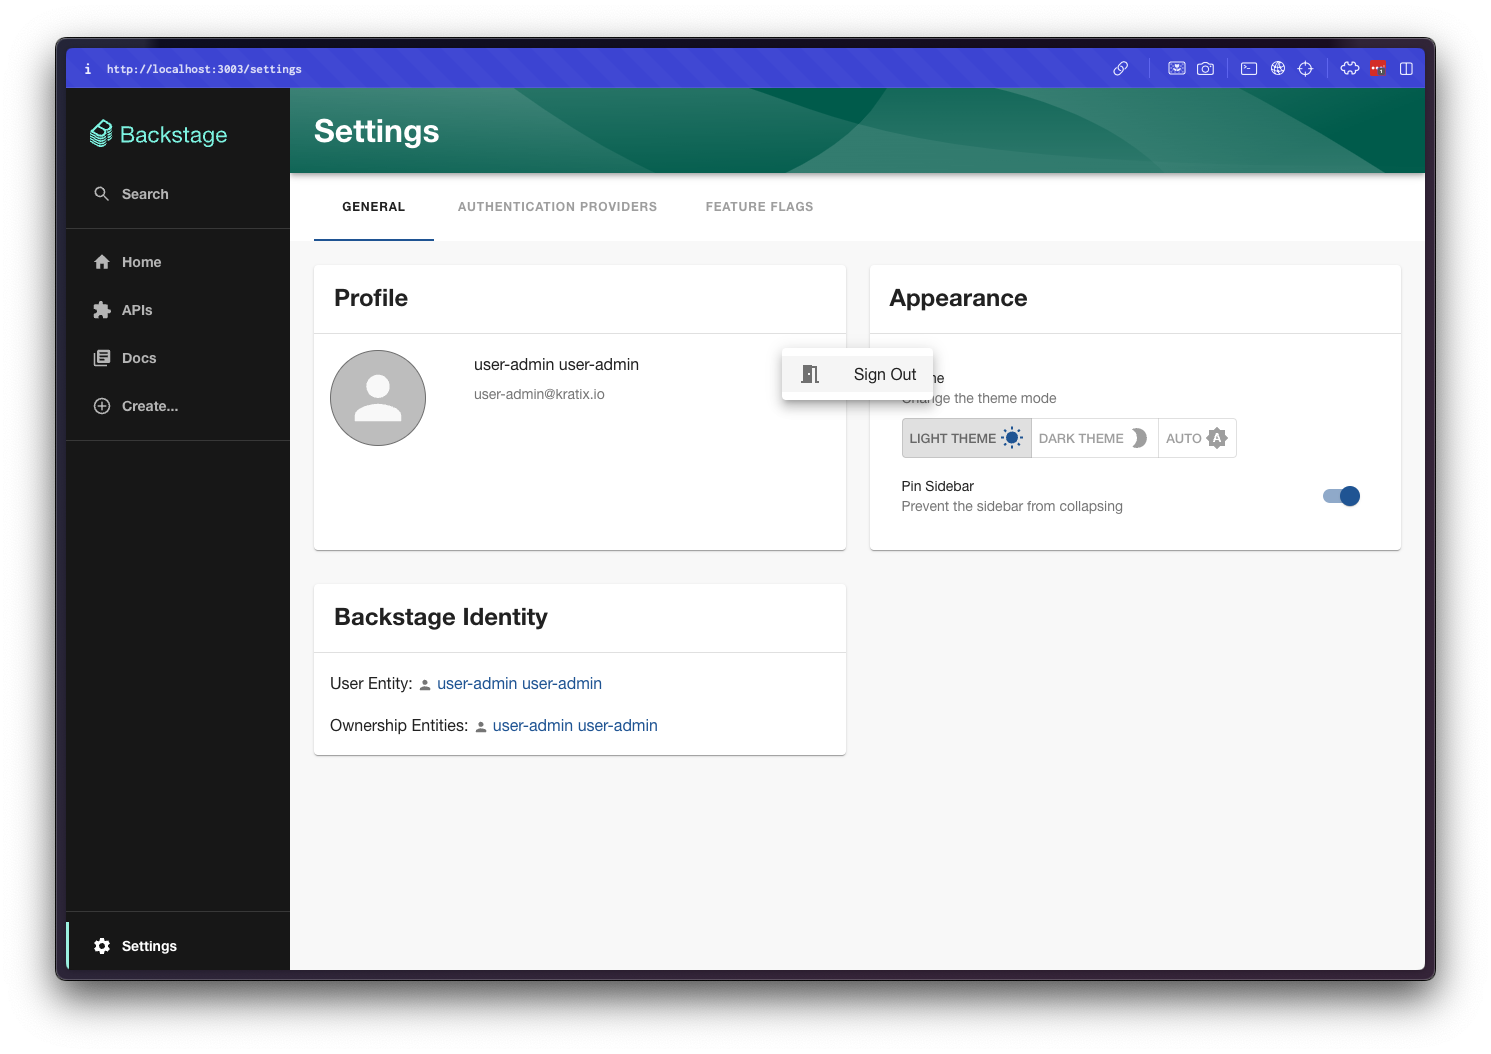
After logging in, you will be redirected back to Backstage and you should be logged in. If you navigate to the Settings page, you should see your user information:
Excellent! Final step is to configure the SKE plugins to communicate with your Platform cluster, using the Keycloak token.
Configuring the SKE plugins
This section assumes you have a SKE License token, have access to the SKE Backstage plugins, and installed them in your Backstage instance (or that you have cloned the example Backstage app). If that's not your case,you can follow a step-by-step guide on how to configure the SKE Backstage plugins here.
Make sure you have the latest version of the SKE plugins installed. This post requires, at a minimum, ske-backend v0.14.0 and ske-frontend v0.13.0.
The configuration of the plugins is very straightforward. All you need to do is:
- Add the Platform cluster to your app config.
- Tell the SKE Plugins the name of the platform cluster.
Both of those changes are done via the app-config.yaml file.
Locate the kubernetes section (or create one if it doesn't exist) and add the Platform cluster:
kubernetes:
  serviceLocatorMethod:
    type: multiTenant
  clusterLocatorMethods:
    - type: config
      clusters:
        - url: "https://<your kind cluster url"
          name: kratix-platform
          authProvider: oidc
          oidcTokenProvider: keycloak
          skipTLSVerify: true
To find your KinD cluster URL, run kubectl cluster-info --context kind-platform
You must now tell the backend plugin which cluster is the platform cluster. For that, add the following section to your app-config.yaml:
ske:
  kubernetes:
    # make sure this matches name of the cluster in the `kubernetes` section
    platformName: kratix-platform
Excellent. You should now have a working Backstage instance with Keycloak authentication and SKE plugins configured to work with your Platform cluster. Let's test it all together now.
Testing it all together
Populating the Catalog
If you have SKE and Backstage fully configured, you could try to install a Promise and create a new resource via the Template. If not, you can register the template available here directly in your instance.
If you cloned the example backstage application, you can skip this step.
For that:
- Open your
app-config.yaml - Locate the
catalog.locationssection - Add to the list:
- type: url
  target: https://github.com/syntasso/blog-backstage-oidc/blob/main/examples/ske-entities.yaml
  rules:
    - allow: [Template]
Now you restart your Backstage instance.
Using the template
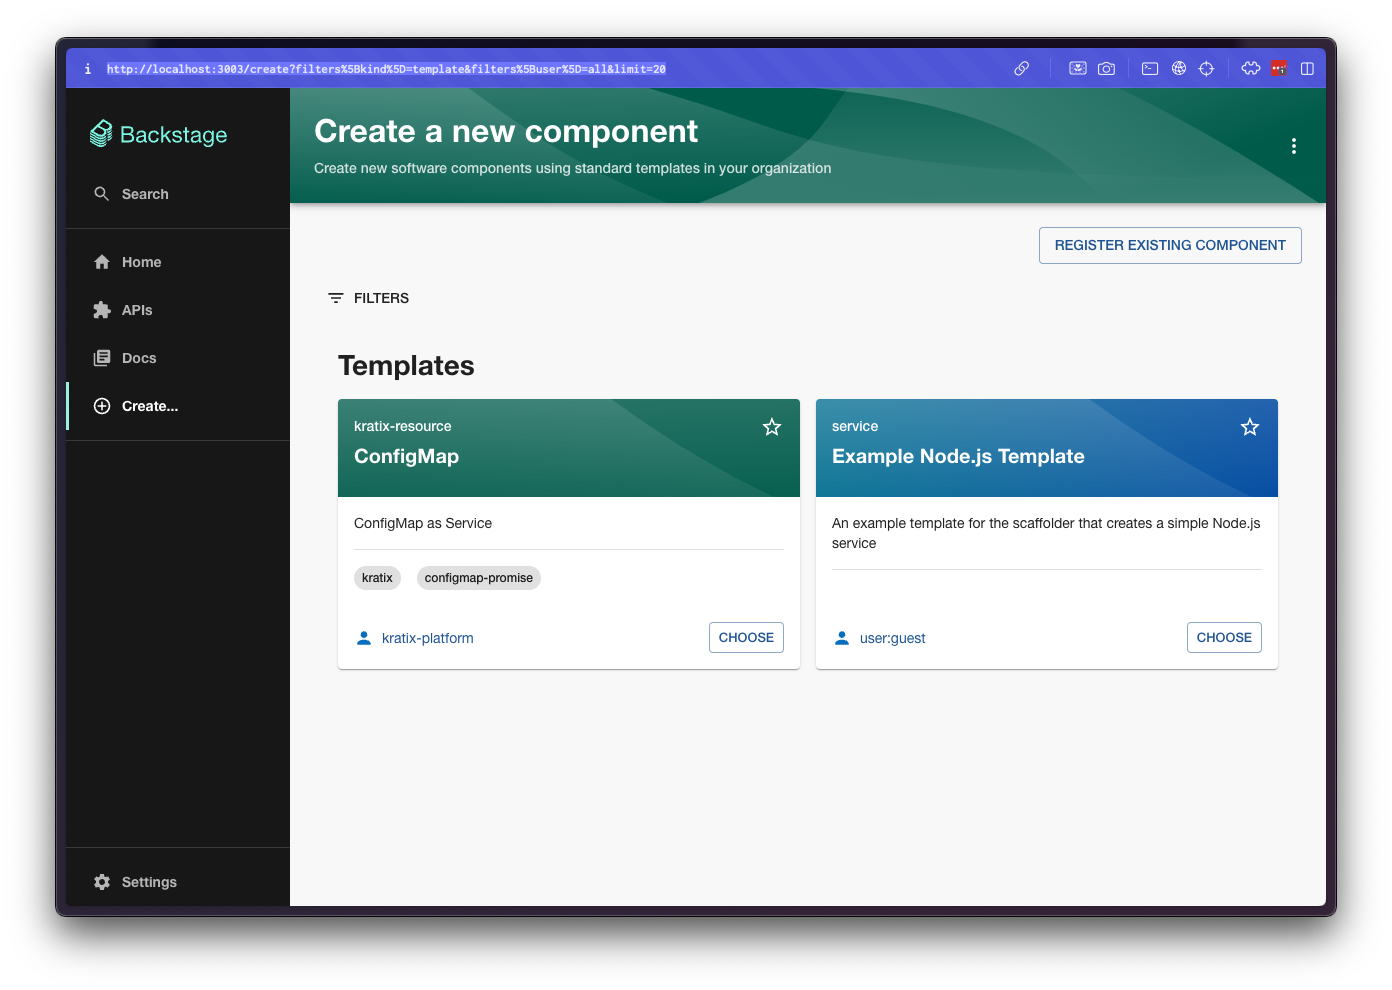
Once you have a template registered in your Backstage instance, you can use it to create a new resource. This could either be your the Template generated by your Promise or the template you registered in the previous step. We will assume you are using the example Template in the next steps.
Locate and click the CREATE button in the sidebar and select the ConfigMap:
Follow the steps and configure a new ConfigMap. Don't forget to click the + icon to add key-value pairs to your ConfigMap.

Proceed with the form and create the ConfigMap:
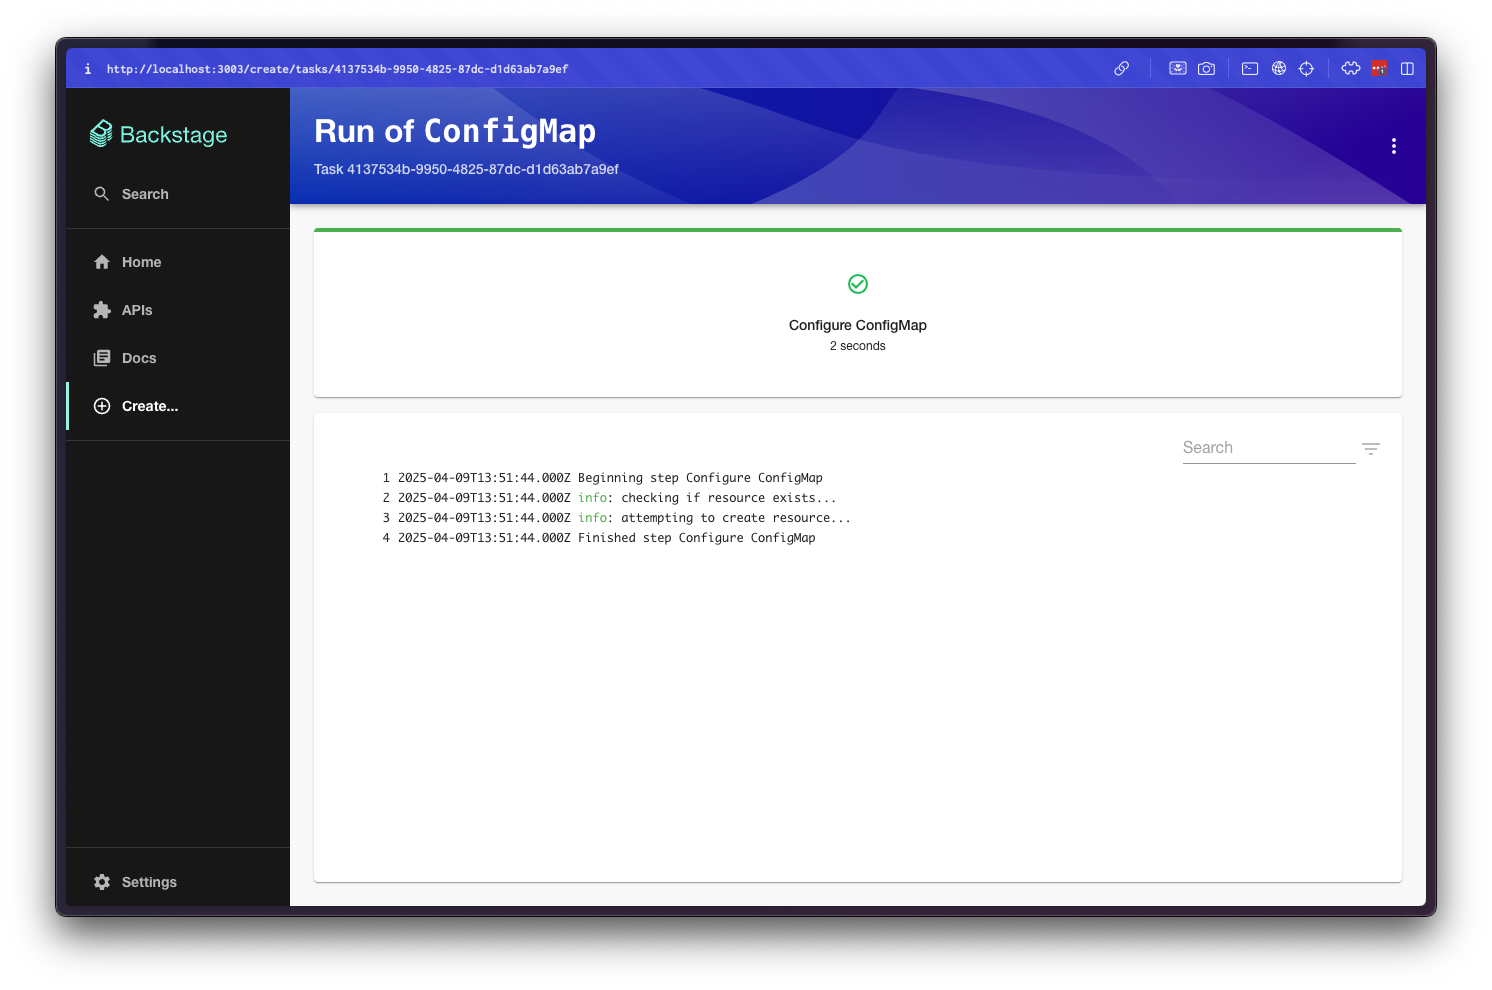
At this stage, you should have a new ConfigMap in your Cluster:
$ kubectl --context user-admin get configmap test-configmap # or the name you used!
NAME             DATA   AGE
test-configmap   2      1m
Great! Now logout and login with the user-dev user. To logout, click Settings on the bottom-left corner, then the three dots, and Sign Out
Logged in as the user-dev user, try to create a new ConfigMap following the same steps.
You should get a 403 error, since the user-dev user does not have the required permissions:
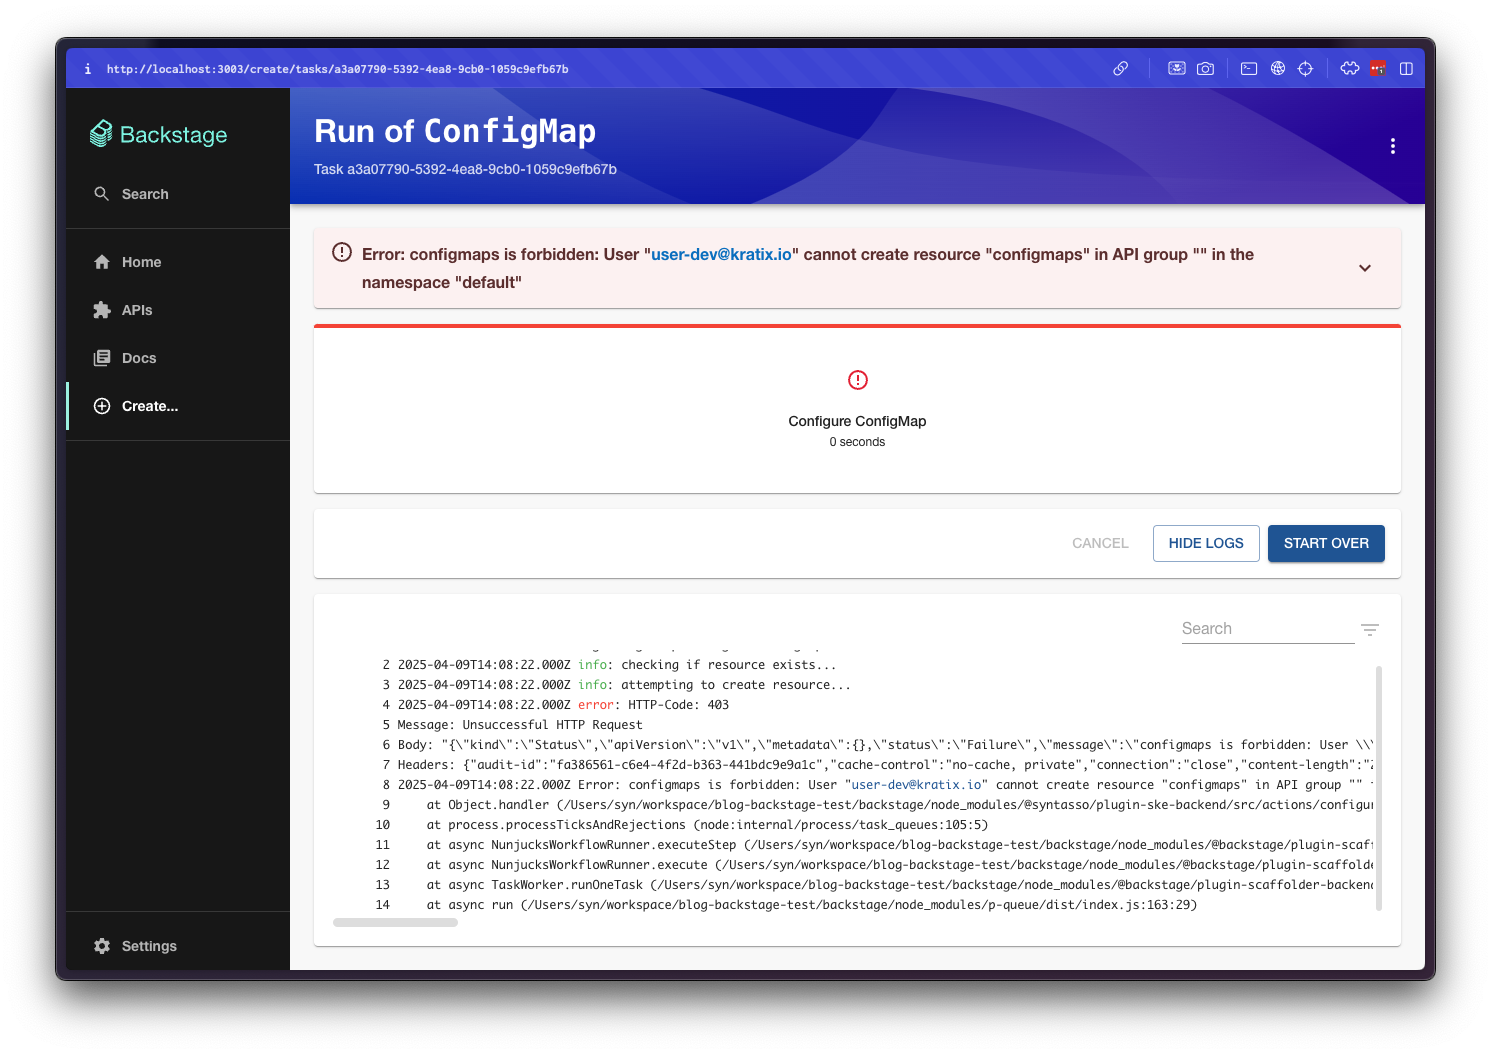
🎉
Conclusion
By integrating Keycloak with both Kubernetes and Backstage, and configuring the SKE Backstage plugins to leverage OIDC tokens, we've created a seamless and secure developer experience. This setup not only simplifies authentication and authorisation but also enables fine-grained access control across your platform, allowing you to manage who-can-do-what directly from your Kubernetes cluster.
Communicating directly to the Platform cluster opens up a new world of possibilities of what Kratix can now surface to Backstage. Most up-to-date status, pipeline progress, logs, and much more. We are still prioritising what we think will bring the most value, but we are very curious to hear any feedback or suggestion you might have.
While article focuses on the Backstage, Kratix can be integrated with any portal or interface. For example, check out this video to see how Kratix can integrate with Port. We're also keen to hear what you are using (or planning to use) as the interface to your platform in your organisation, and hearing how could Kratix help you out.
As always, ping us directly via Github or in our Community Slack.
